In 1985 I invested in a startup company that went broke that was trying to build satellite uplinked internet access stations that ran on Solar Power, The million dollar concept was to enable third world countries with no internet backbone to provide internet to everyone corner of the world . At the time it was close to science fiction trying to operate on the now defunct Motorola Iridium satellite network (bankrupt in 1999). Just look at the impact that my idol Elon Musk has done with Starlink on the war in the Ukraine. It is much easier to read through the propaganda when you have live feeds of the war and social media verification disconnected from the government and media censorship. The truth through the internet will set us free. Imagine the potential for stand alone worldwide internet in terms of education, communication, health care, and economic opportunity for all and especially deregulation. I couldn’t help recalling that failed investment as I installed my RV activated Starlink dish on my Revel Van – at last.
There is a lot of discussion about hacking the Starlink to work with 12 volts in mobile applications to save the 10% power waste in converting to 110. Although it looks like a simple fix, the power requirements for the dish are not simple. Starlink recently announced that it is experimenting with full power transmissions which increases the power usage of unit significantly . Also, the unit which has a snow melting mode which when activated can drive the the power usage to 450w. Real time averages in summer are running around 120 watts or about 2 kw a day. My Revel can sustain a 24 hour Starlink session on a cloudy day with about 20 percent draw down on my two LiPo4 batteries. If I add an extra external Solar Panel, I can break even with solar. I’m not planning to hack the Starling Router for a 12 volt to 54 volt inverter till the power usage stats are better understood.
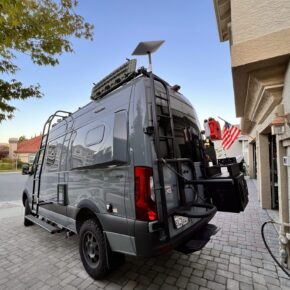
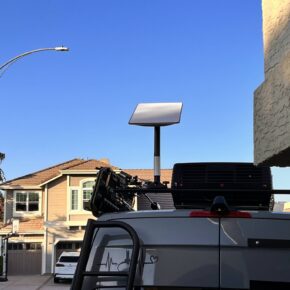
I had fun engineering a mounting solution for the Dish. I think it is more versatile to keep the 75 foot length option of the cable incase you park under some trees and want to position the dish on the ground away from trees. I also wanted a way to pop it easily on the roof if I was camping with no obstructions. There were three challenges to this design. The first was how to mount it on the roof rail near the ladder for easy temporary installation. I didn’t want to permanently install it. Second was how to run the cable through the body of the van to the outside so I didn’t have to keep a door or window open for the cable. Thirdly, how to position and store the router, extra cable and dish when in use and while traveling.
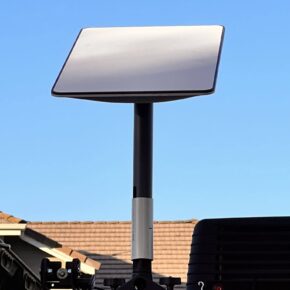
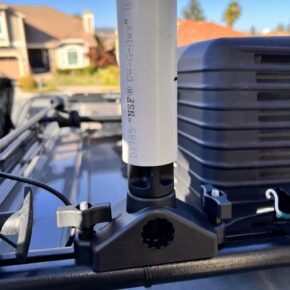
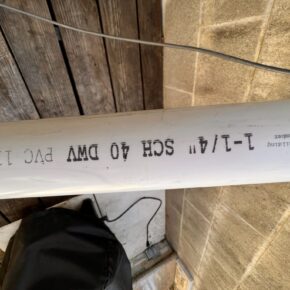
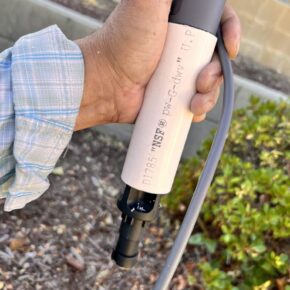
To mount the dish, I used a Scotty Fishing Rod holder (Scotty 0343 Locking Gunnel Track Mount) designed to screw into the roof rail. I’ve used these very versatile attachments to attach everything from fishing sonars and transducers to stripping baskets, and heavy downrigger motors to my boats and pyramid lake ladders. The rail attachment screws included in the holder at T shaped and insert into the Revel Roof Rails easily without disassembly of the rail to slide them in. To attach the dish, I modified a Scotty extension (Scotty 259 Rod Holder Height Extender) by cutting it at its narrowest circumference and inserting a short section of schedule 40 1 1/4″ PVC over it . It fits snuggly and securely with a couple taps of a mallet. The whole system is light, strong and easy to install. The stock post on the Starlink dish fits perfectly in the PVC.
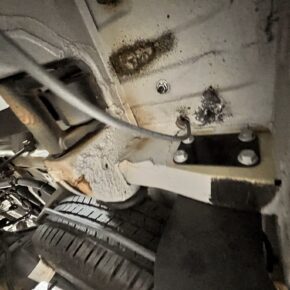
Some RVrs are cutting the Starlink cable and attaching Cat5 ends. They use a passthrough connector to put an ethernet port on the outside -very elegant. Personally , I wanted to keep my cable intact and long since it would give me some options on dish placement in tricky areas. I decided to drill the smallest hole that I could pass the narrowest end of the cable ( the dish side) through the floor of the van. That would be a one inch hole. I bought a Garmin Cable Grommet to seal it off when not in use. This cap is nice because you can put it around the cable and push it into the whole without passing the cable through the hole.
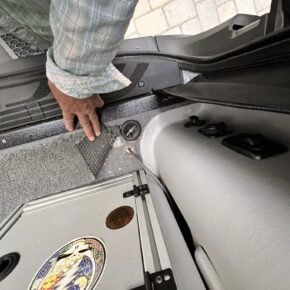
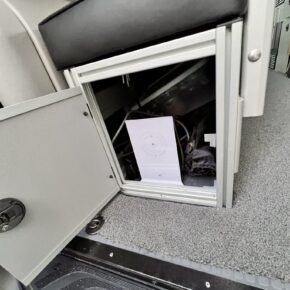
I manage the long Starlink cable in a “cord reel “, and positioned the cable and router in the GLS cabinet near the ladder. There is a 110 plug easily accessible inside the cabinet. I can store and use the unit inside that cabinet. I found a padded fabric storage cover that fits the Dish perfectly instead of a hard box which takes up more space. The cover was originally designed as a Travel Case for a 24″ IMac. The padding and the handles make it easier to carry up the ladder and the dish seems to work well even with it attached.
Finally, I put an ethernet adapter on the Starlink so that I could attach a laptop directly to the router when working in the GLS. Using the advanced diagnostics on the Iphone Starlink App, the router speeds always seem to be much faster than the wireless speeds. I’m pretty sure that the performance will vary considering where I will be but having internet in the most desolate areas is certainly an amazing technological achievement for an old bandwidth addict like me.